How To Shape And Fill Your Eyebrows For Beginners With A Pencil
Getting your eyebrows just right can feel like a big deal, can't it? They truly frame your face, giving a kind of structure and expression that nothing else quite does. A good brow can make your eyes look brighter, your face more balanced, and, in a way, just pull your whole look together. For lots of people, figuring out where to even begin with them is that bit of a puzzle.
That's where the humble eyebrow pencil comes in, honestly. It's probably one of the most straightforward tools out there for anyone just starting to play around with their brows. You see, it gives you a lot of control, making it simpler to add a little color or fill in those sparse spots without feeling like you're doing too much. It's a really forgiving choice for learning the ropes, which is something you'll appreciate, I think.
This guide is here to walk you through everything you need to know about using an eyebrow pencil. We'll talk about picking the right shade, finding a shape that works for your face, and then, you know, actually putting pencil to brow. We'll even cover some common little slip-ups to avoid, so you can feel pretty confident about getting those brows looking just the way you like them, more or less, every time.
Table of Contents
- Why Your Eyebrows Matter So Much
- Picking the Right Eyebrow Pencil for You
- Finding Your Best Eyebrow Shape (Based on Face Structure)
- Getting Ready: Prepping Your Brows
- Step-by-Step Guide: Using an Eyebrow Pencil for Beginners
- Common Eyebrow Pencil Mistakes to Skip
- Keeping Your Eyebrows Looking Good All Day
- Different Looks You Can Try
- Frequently Asked Questions About Eyebrows
Why Your Eyebrows Matter So Much
Your eyebrows, you know, they really do play a big part in how your face appears. They are, in a way, the natural frame for your eyes, and they can significantly alter your overall facial features. A well-groomed brow can actually make your eyes look larger and more open, which is pretty neat.
What's more, the way you shape your brows can change the expression on your face. For instance, very straight brows might make you look a bit serious, while a nicely arched brow could give you a more open or even a surprised appearance, you see. It's quite amazing how much impact they have on your entire look, actually.
Picking the Right Eyebrow Pencil for You
Choosing the best eyebrow pencil is a pretty important first step, as a matter of fact. You want something that will work with your natural hair color and skin tone, creating a look that feels just right for you. It's not just about grabbing any pencil, you know.
Color Choice
For most people, picking a pencil that's one or two shades lighter than your natural brow hair is a good idea. If you have very dark hair, going a bit lighter helps avoid a harsh, drawn-on appearance. On the other hand, if your hair is very light, a slightly darker shade can add some welcome definition, typically.
If you have red hair, for instance, a warm blonde or a light brown with a red tint might be a nice choice. For those with black hair, a dark brown or charcoal gray can look more natural than a stark black, which, you know, can be a bit much sometimes.
Pencil Types
Eyebrow pencils come in a few different forms, each with its own feel. Some are more waxy, giving a good hold and a precise line. Others are more powdery, creating a softer, more diffused look, which is sometimes what you want. Then there are those that combine properties, offering a bit of both worlds, more or less.
For beginners, a pencil that isn't too soft is often best. A softer pencil can be easy to overdo, making it harder to control the amount of product you're putting down. A slightly firmer pencil gives you more precision, so you can build up color gradually, which is really helpful, honestly.
Features to Look For
Many eyebrow pencils come with a spoolie brush on one end, and this is a really handy feature. The spoolie helps you brush your brow hairs into place before you start, and then it's absolutely perfect for blending the product through your brows afterward, creating a more natural finish. It's almost like having two tools in one, you know.
Also, consider the pencil's texture. You want one that glides on smoothly without pulling at your skin, but not so creamy that it smudges easily. A good pencil will feel comfortable to use and stay put for a reasonable amount of time, you see. You'll find what feels good for you, I'm sure.
Finding Your Best Eyebrow Shape (Based on Face Structure)
The shape of your eyebrows can really work with your face to bring out your best features. As we often talk about on our site, your face shape plays a key role in figuring out the most flattering eyebrow style. There are many different eyebrow shapes and styles out there, from short and full to tapered at the ends, and even bleached or laminated looks, you know.
For someone with a round face, for example, a slightly higher arch can help add some length and definition, making the face appear a bit longer. If you have a square face, a softer, more rounded arch can help to soften your angles. Oval faces, on the other hand, often suit a softer, more balanced arch, which is pretty versatile.
A heart-shaped face might benefit from a softer, rounded arch to balance the wider forehead and narrower chin. For long faces, a straighter, flatter brow can help to shorten the appearance of the face by drawing the eye horizontally, which is a neat trick. Luckily, eyebrows can be made to fit your own individual style preference and face shape, so you have options, basically.
This guide helps explain the types and names of eyebrow shapes, helping you select the best eyebrow for your unique features. Remember, the goal is to create balance and harmony on your face, so that's something to think about, you know.
Getting Ready: Prepping Your Brows
Before you even pick up that pencil, a little bit of prep work goes a long way. It’s like getting your canvas ready before you paint, you know? This small step can make a big difference in how your finished brows look, honestly.
Cleanse
Make sure your brows are clean and free of any leftover makeup or oils. A quick wipe with a gentle cleanser or a bit of micellar water will do the trick. This helps the pencil go on smoothly and stay put, which is what you want, right?
Brush
Use that spoolie brush, if your pencil has one, or a clean mascara wand to brush your brow hairs upwards and outwards. This helps you see the natural shape of your brows and identify any sparse areas that need a little extra attention, you see. It also helps to distribute your natural brow hairs evenly, which is good for starting.
Trim (If Needed)
If you have any really long hairs that stick out above your natural brow line, you can carefully trim them. Just brush the hairs straight up and snip only the very tips that go beyond the main shape. Be really careful here, as you can't put hair back once it's cut, obviously. This step isn't always needed, but it can make a big difference for some, typically.
Step-by-Step Guide: Using an Eyebrow Pencil for Beginners
Alright, so you've got your pencil, and your brows are prepped. Now for the fun part: actually filling them in. Remember, the key here is a light hand and building up the color slowly. You can always add more, but taking it away is a bit trickier, as a matter of fact.
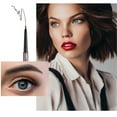
Step 1: Locate Your Start, Arch, and End Points
This is a really helpful technique for finding your natural brow shape. You can use your eyebrow pencil or any thin, straight object, like a makeup brush handle, for this. It's a bit like mapping out your face, you know.
- Start Point: Hold the pencil vertically along the side of your nose, lining it up with the inner corner of your eye. Where the pencil hits your brow bone is usually where your brow should begin. Make a tiny, faint mark there, just a little dot.
- Arch Point: Look straight ahead into a mirror. Place the pencil against the side of your nose and angle it so it passes through the center of your iris (the colored part of your eye). Where the pencil meets your brow is typically where your arch should be. This is where your brow should have its highest point, you see. Mark this spot lightly.
- End Point: Keep the pencil at the side of your nose and angle it so it lines up with the outer corner of your eye. Where it hits your brow bone is where your brow should finish. A brow that extends too far can drag your eye down, while one that's too short can make your face look wider, so this point is important, honestly. Mark this spot too.
These three points give you a general guide for your brow shape. They're like little anchors for your design, you know, helping you stay within your natural boundaries.
Step 2: Lightly Outline the Bottom Edge
Using very light, feathery strokes, gently draw a line along the bottom edge of your brow, connecting your start point to your arch point, and then from the arch to the end point. This creates the lower boundary of your brow. Remember, you're not drawing a solid line, but rather a soft guide, just a little bit of definition, you know.
Keep your hand really light, almost like you're barely touching your skin. This makes it easier to blend later and avoids that harsh, "drawn-on" look that nobody really wants, you see. It's all about building up, not putting it all down at once, basically.
Step 3: Gently Outline the Top Edge
Now, do the same for the top edge of your brow. Start from your arch point and extend a light, soft line down to your end point. For the front part of your brow, from the start point to the arch, you might not need to draw a full line on top. Often, just brushing the hairs up is enough here to keep a more natural look, you know.
The top line should be even softer than the bottom, if that makes sense. You want to maintain a natural appearance, so avoid making a very defined, sharp line here. It's really just a suggestion of a line, in a way.
Step 4: Fill in Sparse Spots with Small Strokes
This is where the magic happens. Instead of coloring in your entire brow, think about drawing tiny, hair-like strokes in the direction your natural brow hairs grow. Focus on any areas where your brows look a bit thin or patchy, you see.
Use very short, light strokes, flicking the pencil upwards, to mimic individual hairs. This creates a much more natural and believable look than just coloring in a block. You're trying to make it look like you have more hair, not just color on your skin, you know. Take your time with this, building up the fullness gradually, which is pretty important.
Step 5: Blend with a Spoolie
Once you've added color, grab that spoolie brush again. Gently brush through your entire brow, starting from the front and moving towards the tail. This helps to soften any harsh lines you might have made and distributes the product evenly, making your brows look more uniform and natural, as a matter of fact.
Blending is a very important step; it truly makes the difference between brows that look filled in and brows that look like they're naturally full. Don't skip this part, honestly. It helps to blur the pencil lines into your actual brow hairs, which is the goal, you know.
Step 6: Set Your Brows
For extra staying power, especially if you have unruly brow hairs or want your look to last all day, you can use a clear brow gel or a brow wax. Just brush a small amount through your brows with another spoolie, shaping them as you go. This helps to keep every hair in its place, giving you a polished finish, which is pretty nice.
This step is optional, but it can really make your efforts last longer, particularly if you're going to be out and about for a while. It's a bit like hairspray for your brows, you know, just a little extra hold.
Common Eyebrow Pencil Mistakes to Skip
Even with the best intentions, it's easy to make a few common slip-ups when you're just starting out with eyebrow pencils. Knowing what to watch out for can save you some frustration, you see.
- Too Dark a Color: Using a pencil that's too dark for your hair color can make your brows look harsh and unnatural. Always aim for one or two shades lighter than your hair, as we talked about, or even your root color if your hair is dyed, which is a good tip.
- Harsh Lines: Drawing solid, heavy lines instead of light, hair-like strokes is a common one. This creates a very artificial look. Remember to use a light hand and blend, blend, blend, you know.
- Overfilling: Trying to make your brows too thick or too dark can overwhelm your face. The goal is to enhance your natural brows, not draw new ones on. A little goes a long way, honestly.
- Ignoring Natural Hair Growth: Filling against the direction of your hair growth can make your brows look messy or drawn-on. Always follow the natural flow of your hairs, which is pretty important for a natural finish.
- Skipping the Spoolie: Not blending with a spoolie is a big one. It's the secret weapon for making your brows look soft and natural. Don't forget this step, you see.
Keeping Your Eyebrows Looking Good All Day
Once you've put in the effort to get your brows looking just right, you want them to stay that way, don't you? There are a few things you can do to help your pencil work last longer, you know.
Setting Products
As mentioned earlier, a clear brow gel or a tinted brow gel can really lock your pencil work in place. The tinted gels can also add a bit more color and fullness if you want it. They act like a sealant, keeping your brow hairs and the pencil product from moving around, which is pretty helpful, obviously.
Touch-Ups
If you have particularly oily skin or live in a humid place, you might find your brows need a quick touch-up later in the day. A small, portable brow pencil is great for this. Just a few quick strokes and a brush with the spoolie can refresh your look in minutes, you see. It's good to be prepared, basically.
Different Looks You Can Try
The beauty of using an eyebrow pencil is how versatile it is. You can achieve various looks, from very subtle to more defined, just by adjusting your technique. Whether you're aiming for bold, dramatic arches or a more natural, subtle look, the right eyebrow pencil can help, you know.
Natural, Soft Look
For an everyday, natural appearance, focus on filling in only the sparse areas with very light, hair-like strokes. Use a pencil shade that's very close to your natural brow color. Blend thoroughly with a spoolie to soften any lines and make it look like your own hair, which is the main idea here, honestly. This look is about enhancing what you already have, more or less.
More Defined Look
If you want a bit more impact, you can build up the color a little more, especially on the bottom edge and the arch. You might use a slightly darker shade, but still within a natural range. Be sure to keep the front of your brow lighter and softer than the tail for a graded effect, which is a neat trick. This gives your brows more presence, you see.
Remember, there are many different eyebrow shapes and styles, from short and full to tapered at the ends, to bleached and laminated. The best eyebrow shape for you depends on your face, and you can truly tailor your brows to best fit your own individual style preference. You can see more about this, for example, by learning more about brow services that can help you understand your options.
Frequently Asked Questions About Eyebrows
What's the best way to choose the right eyebrow pencil color for me?
Generally, you want to pick an eyebrow pencil that's one or two shades lighter than your natural brow hair color. This helps create a softer, more believable look. If you have very dark hair, a deep brown or charcoal can often look more natural than a stark black, you know. It's all about blending in, pretty much.
How can I make my eyebrow pencil look more natural?
To make your eyebrow pencil look really natural, use very light, short, hair-like strokes, focusing on filling in sparse areas rather than drawing a solid line. Always brush through your brows with a spoolie after applying the pencil to blend the product and soften any harsh lines, which is a really important step, honestly.
Should I draw a line under my eyebrow?
You can draw a very light, soft line along the bottom edge of your eyebrow to define its shape, especially if you're a beginner. However, it's important to keep this line very faint and blend it out well with a spoolie. Avoid drawing a harsh, dark line, as this can look unnatural and too severe, you see. A soft guide is good, but not a heavy border.
So, you know, getting your eyebrows just right with a pencil is truly a skill that anyone can learn. It just takes a bit of practice and patience, honestly. Start with those light strokes, build up the color slowly, and always, always remember to blend. The more you do it, the more comfortable and quicker you'll become, which is pretty much how most things go, right?

Eyebrows Drawing Pencil
How To Do Eyebrows Makeup With Pencil | Saubhaya Makeup
False Eyebrows Give Brow 3 Light Eyebrow Pencil Eyebrow Kits for
