Repairing Laminate Flooring: Your Guide To A Beautiful, Lasting Floor In 2024
Is that chipped spot on your beautiful laminate floor starting to really get to you? Perhaps a tiny scratch or a bigger gouge is catching your eye every time you walk by. It’s a common sight, actually, as a matter of fact, and can feel pretty frustrating when your once-perfect floor shows signs of wear and tear. No one wants a floor that looks tired or damaged, you know, especially when it’s such a central part of your home’s feel.
When your laminate floor takes a hit, it might seem like a big job to put things right again. But there are ways to save your floor, restoring it to a sound condition after damage or injury. Thinking about replacing the whole thing can feel like a massive undertaking, and it often comes with a hefty price tag. Good news offers advice on making things good again, rather than starting fresh.
This guide will show you how to tackle those bothersome spots on your laminate, giving you the power to bring back its good looks. We’ll cover everything from small surface marks to bigger issues, helping you understand how to mend what's broken or damaged. You'll learn simple ways to fix up your flooring, making it look great for years to come, and saving you a lot of trouble, too it's almost.
Table of Contents
- Understanding Laminate Damage
- What You'll Need for Repairs
- Fixing Surface Scratches and Scuffs
- Mending Chips and Gouges
- Dealing with Water Damage
- Replacing a Damaged Laminate Plank
- Tightening Up Loose or Separated Planks
- Keeping Your Laminate Looking New
- Frequently Asked Questions About Laminate Repair
- Your Floor Can Look Great Again
Understanding Laminate Damage
Laminate flooring, while tough, isn't completely immune to life's little accidents. Knowing what kind of damage you're facing is the very first step in putting it right, so. The meaning of repair is to restore by replacing a part or putting together what is torn or broken. This means understanding the specific issue helps you pick the best approach to make it whole again.
Common Troubles with Your Floor
You might see a few different kinds of wear and tear on your laminate. There are surface scratches, which are usually just on the top layer, and then deeper gouges that actually remove some of the material. Sometimes, a heavy item dropped can cause a chip, or a spill left too long might lead to water damage, causing the planks to swell or lift. Each problem needs its own kind of attention, you know, for a proper fix.
Recognizing the Signs
Taking a good look at the damage helps you figure out what's going on. Is it just a light mark that disappears when you rub it a little? Or is it a deep cut that you can feel with your fingernail? Is the floor feeling spongy in spots, or are the edges of the planks starting to puff up? These observations will guide your repair efforts, making sure you tackle the root cause effectively, pretty much.
What You'll Need for Repairs
Before you jump into fixing your floor, gathering the right tools and materials is, you know, super important. Having everything at hand makes the job smoother and helps ensure a good outcome. It's like preparing for any project, you want to have all your supplies ready.
Essential Tools and Materials
For smaller repairs, you might just need a laminate repair kit, which often includes wax crayons or filler sticks. For bigger jobs, you could be looking at a utility knife, a pry bar, a tapping block, and perhaps some wood glue. If you're replacing a plank, you'll definitely need a new piece of laminate that matches your existing floor, and a way to cut it precisely, too it's almost.
- Laminate repair kit (with wax fillers or pens)
- Wood putty or filler (color-matched)
- Utility knife or laminate cutter
- Pry bar (for plank removal)
- Tapping block and hammer (for re-seating planks)
- Wood glue or specialized laminate adhesive
- Clean cloths and rubbing alcohol
- Protective gloves and eyewear
- Replacement laminate planks (if needed)
Picking the Right Stuff
Choosing the correct color for fillers or finding a matching replacement plank is key to a seamless repair. Many repair kits come with a range of colors you can mix to get the perfect shade. For planks, if you kept any leftover pieces from the original installation, you're in luck! If not, you might need to check with the manufacturer or a flooring store to find a close match, which can be a bit of a challenge, sometimes.
Fixing Surface Scratches and Scuffs
Scratches are probably the most common type of damage you'll see on laminate flooring. The good news is that many of them are relatively simple to mend, especially if they haven't gone too deep. It's about restoring by replacing a part or putting together what is torn or broken, even on a small scale.
Light Marks: Easy Fixes
For those faint lines or scuffs that are just on the surface, a laminate repair pen or a wax crayon can work wonders. These products fill in the tiny grooves and help to blend the scratch into the surrounding floor. You simply apply the product directly to the scratch, then wipe away any excess. It’s a quick and easy way to make those minor imperfections disappear, honestly.
Sometimes, a bit of rubbing alcohol on a soft cloth can even take care of very light scuffs that are just surface marks from shoes or furniture. Just make sure to test it in a hidden spot first to be safe, you know, and then wipe gently. This is a good first step before trying anything more involved, basically.
Deeper Grooves and Scrapes
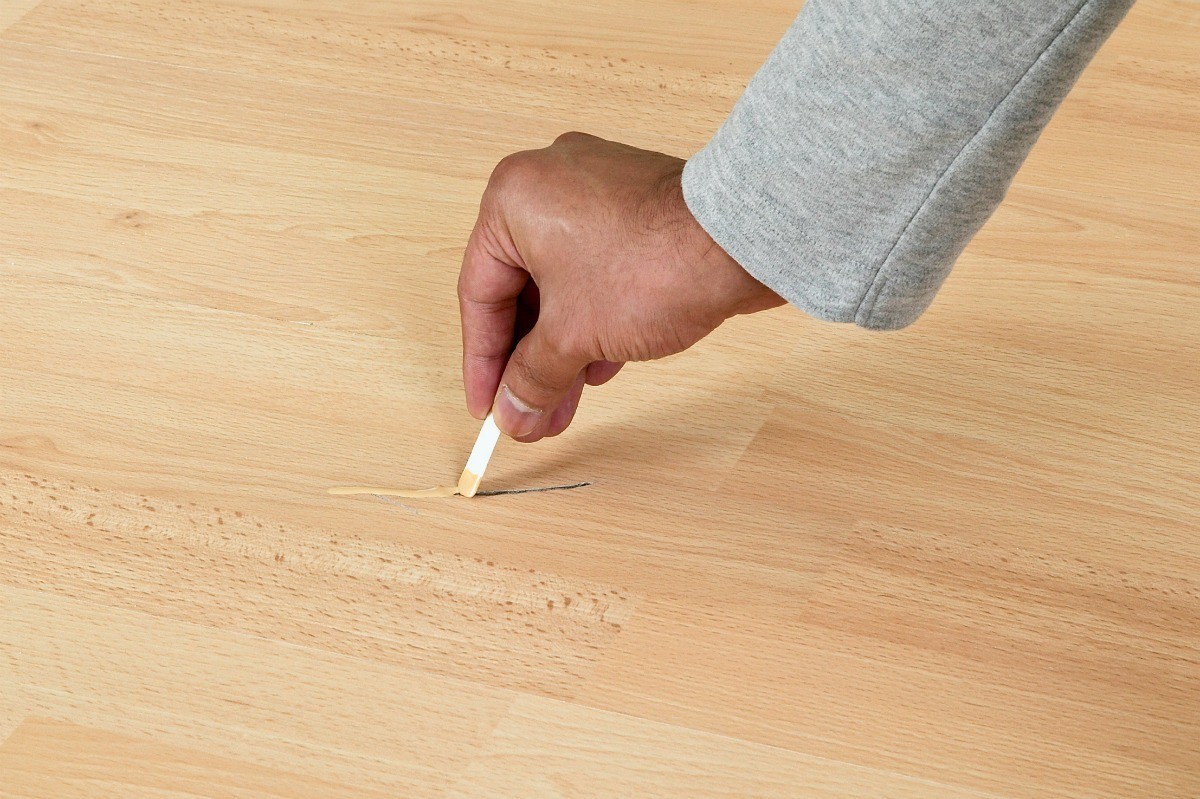
When a scratch is deeper, you'll need something more substantial than a pen. This is where laminate repair paste or wood filler comes in. You'll want to find a product that can be tinted to match your floor's color. Apply a small amount of the filler into the groove, smoothing it out with a putty knife or even your finger, making sure it's level with the floor's surface. Let it dry completely, and then, if needed, you might gently sand it with very fine sandpaper, though this is often not required for laminate, as a matter of fact.
The goal is to restore to sound condition after damage or injury, and with deeper scratches, it means physically filling the void. Some kits even come with a small heating tool to melt wax sticks directly into the scratch, which can create a very durable and color-matched repair. This process is a bit more involved, but it offers a more robust solution for noticeable damage, so.
Mending Chips and Gouges
Chips and gouges are a step up from scratches, as they involve actual missing pieces of your laminate. These need a bit more attention, but they are still very much fixable. It's about restoring the integrity of the surface, you know, and making it look whole again.
Filling in the Gaps
For chips and gouges, a laminate repair paste or a hard wax filler kit is usually the best option. These products are designed to fill larger voids and harden to create a durable surface. You'll typically clean the area first, removing any loose bits or dust. Then, carefully apply the filler into the chipped area, making sure to overfill it just a little, which is that.
If you're using a wax kit, you'll likely melt the wax directly into the chip using a special tool. The trick is to build up the layers until the repair is slightly above the floor's surface. This allows you to then level it out for a smooth finish, which is important for both looks and feel, basically.
Blending for a Smooth Look
Once the filler or wax has dried or cooled, you'll need to level it. For pastes, a putty knife can scrape away the excess, leaving a flush surface. For wax, a special leveling tool, often included in the kit, shaves off the extra material. The key here is to create a repair that is perfectly even with the surrounding laminate, so it doesn't create a bump or a dip, you know. Sometimes, a very fine-grit sandpaper can be used gently to smooth the edges, but be careful not to damage the surrounding good laminate, that is that.
The aim is to make the repair blend in as much as possible, making it nearly invisible. This process is about restoring, reviving, and renewing the floor's appearance. A good blend makes it hard to tell there was ever any damage there at all, honestly.
Dealing with Water Damage
Water is often the biggest enemy of laminate flooring. While laminate is water-resistant, it's not waterproof, and prolonged exposure can cause the core to swell, leading to buckling or bubbling. The approach to water damage depends on how extensive it is, actually.
Small Spills: Quick Action
For small spills that are caught quickly, the damage might be minimal. The most important thing is to clean up the water immediately and thoroughly. Use a dry cloth to soak up all the liquid, then perhaps a fan or a dehumidifier to ensure the area is completely dry. Sometimes, you can gently place something heavy on a slightly swollen spot to help press it back down as it dries, but be careful not to damage the surface, you know. The idea is to prevent the core from absorbing too much moisture, which is that.
If there's just a slight edge lift from a small spill, you might be able to apply a small amount of wood glue under the edge and press it down with weight until it dries. This is a bit of a delicate operation, but it can save a plank from needing full replacement, pretty much.
Bigger Problems: When to Replace
If the water damage is extensive, with planks significantly swollen, buckled, or showing signs of mold, replacement is often the only real solution. Trying to repair severely water-damaged laminate is usually not worth the effort, as the core material is likely compromised beyond simple mending. In these cases, you'll need to remove the affected planks and put in new ones. This is a more involved process, but it ensures a sound and healthy floor moving forward, so. Learn more about home improvement projects on our site, and how to tackle bigger repairs.
Replacing a Damaged Laminate Plank
Sometimes, a repair isn't enough, and a full plank replacement is necessary, especially for severe damage like large chips, deep gouges, or extensive water damage. This might seem like a big job, but it's quite doable for the average homeowner, honestly.
Getting Ready to Swap
First, you'll need a replacement plank that matches your existing flooring. Hopefully, you saved some extra pieces from the original installation. If not, finding a perfect match can be tricky, but many flooring stores can help you find a very close substitute. You’ll also need a utility knife, a pry bar, a tapping block, a hammer, and some wood glue. Make sure your work area is clean and clear, you know, before you start.
The Process: Step-by-Step
Replacing a plank usually involves working from the nearest wall. You'll carefully remove the baseboards along that wall. Then, using a pry bar, gently lift the planks row by row until you reach the damaged piece. Laminate planks are typically clicked together, so you'll need to carefully unclick them. Once you get to the damaged plank, remove it. Now, prepare your new plank. You might need to cut off the tongue edge on one side of the new plank so it can be glued into place easily, which is that.
Apply a thin bead of wood glue along the edge where the tongue was removed, and along the short end of the new plank. Carefully slide the new plank into position, clicking it into the existing row. Use a tapping block and hammer to gently tap it into place, ensuring a tight fit. Once the new plank is secure, reassemble the rows of laminate, clicking them back into place, and then reinstall your baseboards. This process restores or renews your floor by making good what was damaged, pretty much.
Tightening Up Loose or Separated Planks
Over time, laminate planks can sometimes shift, creating small gaps or causing them to feel a bit loose. This is often due to changes in temperature and humidity, or sometimes just heavy foot traffic. But there are ways to save your floor from looking gappy, you know.
Closing the Gaps
For planks that have simply separated slightly, you can often tap them back into place. Use a tapping block and a hammer. Place the tapping block against the edge of the plank that has a gap, and gently tap it towards the adjacent plank until the gap closes. Be careful not to hit the laminate directly with the hammer, as this can damage the edge, obviously. This simple action can often make the floor look much more cohesive, so.
Sometimes, if the gap is near a wall, you might need to remove the baseboard and use a pull bar to draw the entire row of planks tighter together. This ensures that the gaps are closed evenly across the floor, which is that.
When Glue is the Answer
If planks repeatedly separate, or if a particular plank feels very loose and won't stay put with tapping alone, a small amount of wood glue or specialized laminate adhesive can be used. Carefully lift the edge of the loose plank just enough to apply a thin bead of glue along the tongue and groove where it connects to the neighboring plank. Then, press the plank back down firmly and weigh it down with something heavy until the glue dries completely. This creates a more permanent bond, ensuring the plank stays in place, pretty much.
Remember, the goal is to restore to sound condition after damage or injury. Using glue is a more permanent fix for stubborn loose planks, making your floor feel solid and secure again. It's about mending what's not working properly, in a way.
Keeping Your Laminate Looking New
Once you’ve put in the effort to repair your laminate flooring, you'll want to keep it looking great for as long as possible. A little bit of prevention goes a very, very long way in avoiding future damage, you know. It's about ongoing care, just like with anything you want to last.
Simple Steps for Long Life
One of the easiest ways to protect your laminate is to use felt pads under all furniture legs. This stops scratches and scuffs from chairs being pulled or tables being moved. Also, placing doormats at all entrances can trap dirt and grit, which are big culprits for scratching floors. Cleaning up spills immediately is also super important, as we discussed, to avoid water damage, that is that.
Keeping your floor clean with regular sweeping or vacuuming (using a soft brush attachment) helps remove abrasive particles that can scratch the surface over time. For mopping, use a damp, not wet, mop, and make sure to dry the floor completely afterwards, honestly.
Regular Care Pays Off
Controlling the humidity in your home can also help prevent planks from gapping or buckling due to moisture changes. A humidifier in dry climates or a dehumidifier in humid ones can maintain a more stable environment for your flooring. By following these simple maintenance tips, you can significantly extend the life and beauty of your laminate floor, saving you from future repairs and keeping it looking fresh, so. You can learn more about general home maintenance tips on our site.
Frequently Asked Questions About Laminate Repair
People often have similar questions when they're thinking about fixing their laminate floors. Here are some common ones, with straightforward answers, you know, to help you out.
Can you repair laminate flooring?
Yes, absolutely! Many types of damage to laminate flooring can be repaired. From small scratches and chips to even replacing an entire plank, there are methods and products available to restore your floor's appearance. It's often much easier and more affordable than replacing the whole floor, pretty much.
How do you fix a small scratch on laminate flooring?
For small scratches, you can often use a laminate repair pen or a wax crayon designed for flooring. You simply apply the product directly into the scratch, then wipe away any extra. These products help to fill the tiny groove and blend the scratch into the surrounding pattern, making it much less noticeable, honestly.
Is it hard to repair laminate flooring?
The difficulty of repairing laminate flooring really depends on the type and extent of the damage. Small scratches and chips are usually quite easy for anyone to fix with a basic repair kit. Replacing a full plank is a bit more involved and requires a few more tools, but it's still a project many homeowners can tackle themselves with a little patience and the right instructions, you know.
Your Floor Can Look Great Again
Taking on the task of repairing laminate flooring might seem a bit much at first, but as we've explored, there are practical steps for almost every kind of damage. Whether it's a small scratch or a bigger issue like a chipped plank, putting things right is within your reach. Remember, the meaning of repair is to restore by replacing a part or putting together what is torn or broken, and with your laminate, this means bringing back its original charm and extending its useful life, in a way. So, don't let those imperfections get you down; your floor can look great again with a little effort and the right approach, that is that.

How To Repair Laminate Flooring - Flooring Designs
Repairing Laminate Flooring | ThriftyFun

Repairing Warped Laminate Flooring – Flooring Ideas
