Washing Greens: Simple Steps For Fresher, Safer Meals
Getting your greens ready for a meal is a really important step, you know, and it's something that makes a big difference for your health and how much you enjoy eating. So, whether you're making a big salad or just adding a little something green to your plate, knowing the best way to clean these fresh items is a good idea. It’s a bit like making sure everything else in your kitchen is tidy, too.
You see, fresh produce, even the kind that looks super clean, can carry tiny bits of soil, little specks of dirt, or even, you know, things that you just don't want to eat. Washing is a method of cleaning, usually with water, and it helps get rid of these things. It’s all about making sure your food is as clean as can be before it ever touches your plate, or your mouth, for that matter.
This article is going to walk you through the whole process of washing greens. We'll talk about why it's so important, what tools you might want to have on hand, and give you some easy steps to follow. You’ll learn how to get your greens truly spotless, how to deal with different kinds of leafy items, and even how to keep them fresh after they’ve been washed. It’s pretty straightforward, really, but it makes a world of difference.
Table of Contents
- Why Washing Greens Matters
- Gathering Your Tools for Clean Greens
- Step-by-Step Guide to Washing Greens
- Special Considerations for Different Greens
- Common Mistakes to Steer Clear Of
- Storing Washed Greens for Lasting Freshness
- Frequently Asked Questions About Washing Greens
- Making Clean Greens a Habit
Why Washing Greens Matters
You might think your greens look pretty good right out of the bag or from the garden, but there’s often more to them than meets the eye. Regularly washing, and then rinsing, is an essential part of good hygiene and health, as my text points out. This goes for our food, too, especially fresh produce that grows close to the ground.
For one thing, greens can pick up tiny bits of soil and dirt during their journey from the farm to your kitchen. These aren't just unsightly; they can carry little organisms you don't want to invite to dinner. There might also be residues from sprays used to protect crops, and while these are usually in small amounts, getting rid of them is a good idea. So, washing is really about making your food safe and clean for eating, which is a big part of feeling good and staying healthy.
The meaning of washing is the act or action of one that cleanses with water. And when it comes to greens, water is your best friend. It helps lift away those unwanted bits and pieces, making your salads and cooked dishes taste much better. Think of it as a little spa treatment for your veggies, getting them ready to be enjoyed. It's a simple step, yet very, very effective, actually.
Gathering Your Tools for Clean Greens
Before you get started, having the right things nearby can make the whole washing process a lot smoother. You don't need anything fancy, just a few basic kitchen items. So, a big bowl, maybe one that holds a good amount of water, is pretty much a must-have. This will be where your greens get their first good soak.
A colander, or a strainer with holes, is also super helpful. You’ll use this to drain the water from your greens after they’ve had their wash. It lets the water escape while keeping your greens safely contained. It’s just a simple tool that makes rinsing easy, you know?
Then, for drying, you have a couple of choices. Paper towels are always an option for patting things dry. Or, if you prepare greens often, a salad spinner is a fantastic tool. It uses centrifugal force to gently spin the water right off your leaves, getting them much drier than just patting them down. This step, drying, is quite important, as we’ll talk about later, too.
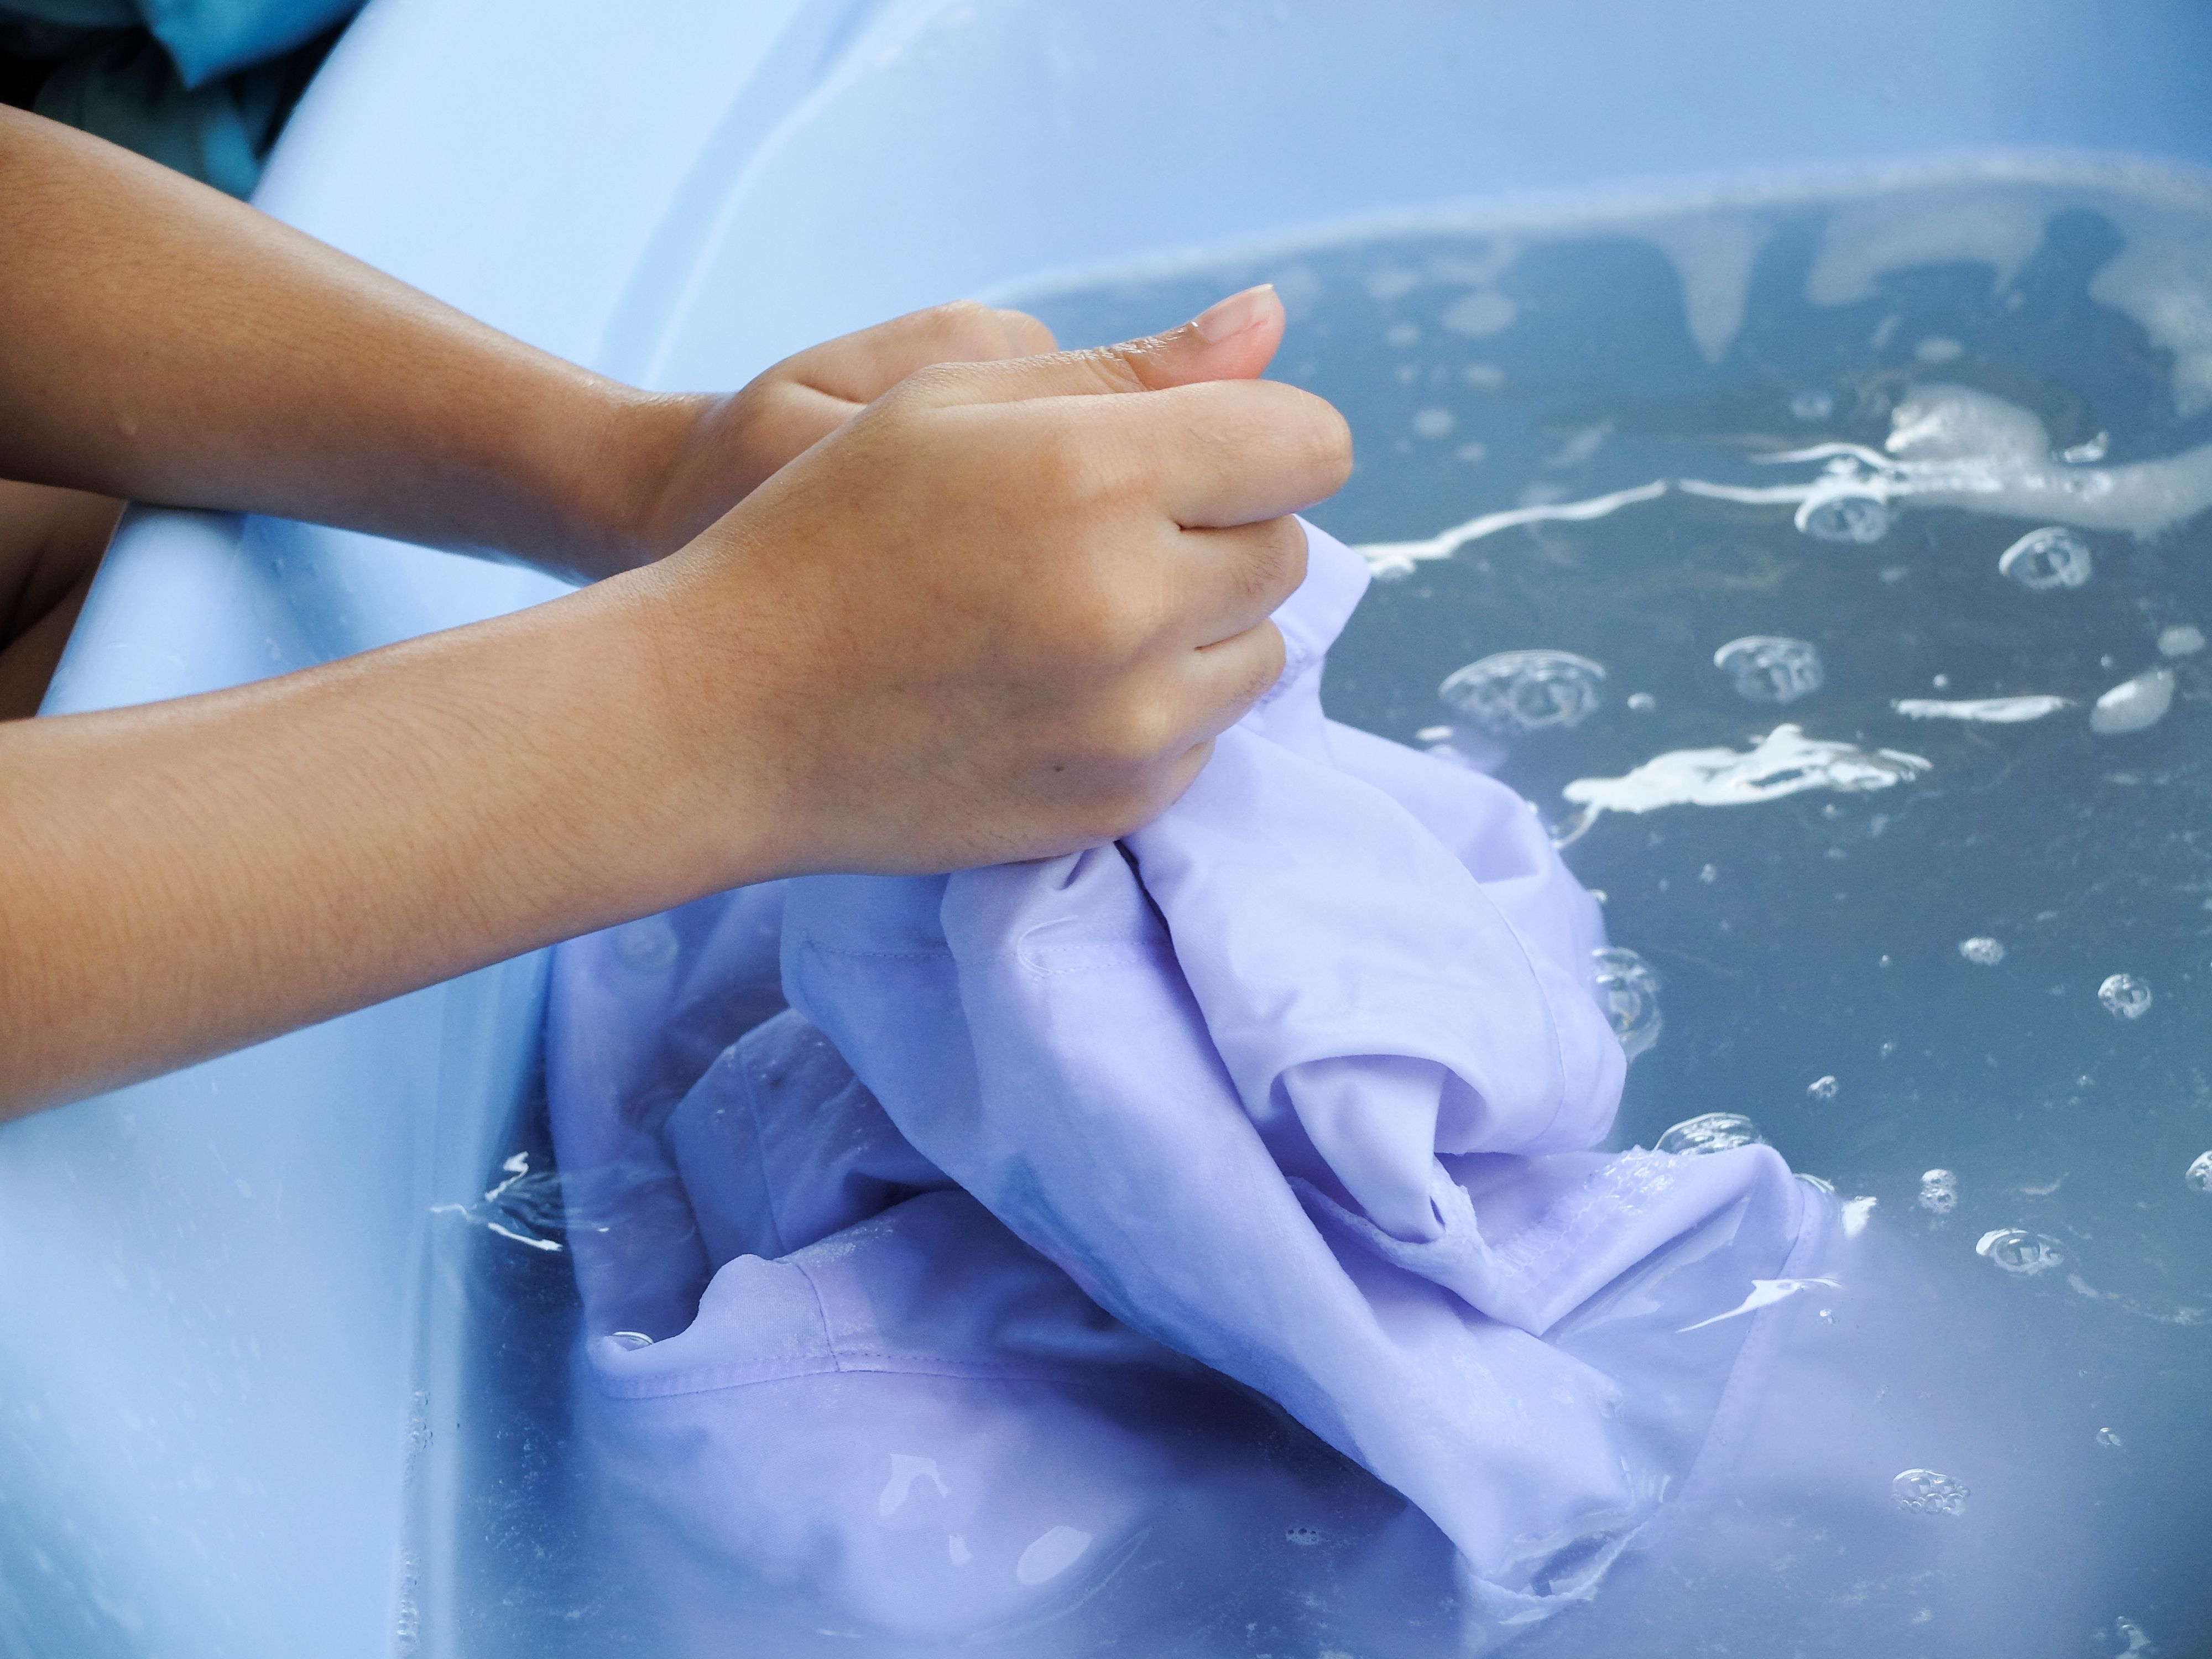
Step-by-Step Guide to Washing Greens
Now, let's get into the actual process. This method works well for most types of leafy greens, from crisp romaine to tender spinach. It's about being gentle but thorough, that's what it is.
The Initial Rinse
Start by separating the leaves of your greens. If you have a head of lettuce, for example, pull the leaves apart. For a bunch of kale, detach the leaves from the tougher stems. This helps ensure that water can reach every surface. Then, hold a few leaves at a time under cool running water. This initial rinse helps knock off any loose dirt or visible debris. It's like the first pass, you know, just getting the obvious stuff off.
Don't just let the water run over them; use your fingers to gently rub the surfaces of the leaves. This little bit of friction helps dislodge anything clinging on. Make sure to get both sides of each leaf. It’s a quick step, but it really sets the stage for a cleaner result, that's for sure.
The Soak and Agitation
After that first rinse, fill your large bowl with cool water. Place your greens into the water. This is where the magic really happens. My text mentions that soaps and detergents help to spread oils and dirt particles through water so they can be washed away. While we're not using soap here, the principle of suspension applies: soaking allows dirt and grit to loosen and fall to the bottom of the bowl.
Let the greens sit in the water for a few minutes, maybe five to ten minutes. You might actually see the water getting cloudy as the dirt settles. While they're soaking, gently swish the greens around with your hands. This agitation helps dislodge any stubborn bits of soil or sand that might be hiding in the crevices of the leaves. It's just like giving them a little bath, you know, helping everything float free.
The Final Rinse
Once your greens have had a good soak and swish, carefully lift them out of the water. Try not to just dump the water and greens together, because you’ll just pour the settled dirt back onto them. Instead, gently scoop the greens out, leaving the cloudy water and any sediment behind in the bowl. You can use your hands or your colander for this step, basically.
Now, place the greens into your colander. Rinse them again under cool running water. This final rinse helps wash away any last traces of loosened dirt or tiny particles. Make sure the water runs clear as you rinse. This means you’ve done a good job of getting everything off. It's that last check, you know, to make sure they are truly clean.
Drying Your Greens
Drying your greens properly is just as important as washing them, maybe even more so for certain uses. Excess water can make your salad dressing watery, and it can also cause your greens to wilt and spoil faster in the fridge. So, getting them dry is a pretty big deal for keeping them fresh and crisp.
If you have a salad spinner, this is its moment to shine. Place the washed greens into the spinner basket, put the lid on, and spin away. You'll be amazed at how much water comes off. Spin them until they feel mostly dry to the touch. It’s a very efficient way to do it, that's for sure.
If you don't have a spinner, lay out some clean paper towels or a clean kitchen towel on a flat surface. Spread your greens out in a single layer on the towel. Gently pat them dry with another towel. You might need to use a few towels if you have a lot of greens. The goal is to remove as much surface moisture as you can. This helps them stay crisp for longer, you know, and ready for whatever you want to make.
Special Considerations for Different Greens
While the basic washing method works for most, some greens have their own little quirks that are worth knowing about. Delicate greens, like baby spinach, spring mix, or butter lettuce, need a very gentle touch. Their leaves are thin and can bruise easily. So, when you’re swishing them in the water, be extra soft, basically. A short soak is usually enough for these tender varieties, too.
Heartier greens, such as kale, collard greens, or Swiss chard, can handle a bit more handling. They often have thicker leaves and sometimes more texture, which can trap more dirt. For these, you might want to give them a slightly longer soak, maybe even changing the water once if it gets very murky. You can also rub their leaves a little more firmly to dislodge stubborn soil, that is that.
What about those "pre-washed" or "triple-washed" greens you buy in bags? This is a question many people ask. While they are marketed as ready-to-eat, many home cooks still prefer to give them an extra rinse. It's really a personal choice, but a quick rinse under cool water doesn't hurt and can offer a little extra peace of mind. Some folks just feel better knowing they’ve done that extra step, you know?
Common Mistakes to Steer Clear Of
Even with something as simple as washing greens, there are a few missteps that people sometimes make. One of the biggest is just not washing them at all. It’s tempting, especially if they look clean, but as we’ve discussed, washing is an essential part of good hygiene and health. Skipping this step means you’re potentially eating dirt, pesticides, or tiny organisms, and nobody wants that, really.
Another common mistake, and this is a really important one, is trying to use soap or detergent to wash your greens. My text specifically mentions soaps and detergents for cleaning, but that’s for things like clothes or your body. You should never use dish soap, hand soap, or any other cleaning product on your food. These products are not meant to be ingested and can leave harmful residues on your greens, making them unsafe to eat. Plain, cool water is truly all you need for washing produce, honestly.
Not drying your greens properly is another frequent oversight. If you leave them too wet, they won't store well, and they'll make your salads soggy. This can be a bit frustrating when you’re trying to make a nice meal. So, take the extra moment to get them as dry as possible after washing. It really does make a big difference in how long they last and how they taste, you know, in the end.
Storing Washed Greens for Lasting Freshness
Once your greens are sparkling clean and nice and dry, you want to keep them that way. Proper storage helps them stay crisp and fresh for several days, sometimes even a week. The key is to keep them cool and to manage moisture. You want them dry enough not to rot, but not so dry they wilt, basically.
A good method is to line a large airtight container or a plastic bag with a few layers of paper towels. Place your dry greens on top of the paper towels. Then, put another layer of paper towels over the greens before sealing the container or bag. The paper towels will absorb any excess moisture, which is what often causes greens to spoil quickly. This little trick really extends their life, that is that.
Store the container or bag in the crisper drawer of your refrigerator. This drawer is designed to maintain a slightly higher humidity level, which is ideal for produce. By following these steps, you’ll have clean, crisp greens ready to go whenever you need them, which is pretty convenient, too. You can learn more about fresh produce on our site for more tips on keeping your fruits and vegetables in top shape.
Frequently Asked Questions About Washing Greens
Do you really need to wash greens?
Yes, you absolutely should wash your greens. Even if they look clean, they can carry dirt, tiny organisms, or residues from the farm. Washing is an essential part of good hygiene and health, helping to make sure your food is safe and clean for you to eat. It's a simple step that really makes a big difference for your well-being, you know.
What's the best way to wash leafy greens?
The best way to wash leafy greens involves a few steps. First, separate the leaves and rinse them under cool running water. Then, soak them in a large bowl of cool water for a few minutes, gently swishing them around to loosen any dirt. Finally, lift the greens out of the water, rinse them again under clear running water, and dry them thoroughly using a salad spinner or paper towels. This method helps get them truly spotless, that's for sure.
Can you wash greens with soap?
No, you should never wash greens with soap, dish detergent, or any other cleaning product. These products are not safe to eat and can leave harmful residues on your food. As my text mentions, washing is the act of cleansing with water, and for greens, plain, cool water is all you need to effectively clean them. Using soap would actually make your greens unsafe to consume, basically.
Making Clean Greens a Habit
Taking the time to wash your greens properly is a small effort that yields big rewards. It’s about more than just getting rid of dirt; it’s about ensuring your food is safe, tastes its best, and contributes to your overall good health. My text reminds us that washing is an essential part of good hygiene and health, and that applies very much to the food we eat, too.
By following these simple steps, you can confidently prepare your fresh produce, knowing it’s clean and ready for whatever delicious meal you have planned. So, next time you bring home those vibrant leafy greens, remember these tips and make washing them a regular part of your kitchen routine. It’s a habit that will serve you well, you know, for many meals to come. Discover more kitchen tips here to make your cooking adventures even better.

7 Tips in Choosing a Good Washing Machine | Lumina Homes

Washing - Wikipedia
How To Hand Wash Clothes Guide To Washing Clothes By Hand | lupon.gov.ph
